Framework Summary
After studying several topics, we have basically gone through all the elements included in the text prompt framework. However, some of you may find it difficult to remember the content, so in this chapter I will summarize the framework.
Official Framework
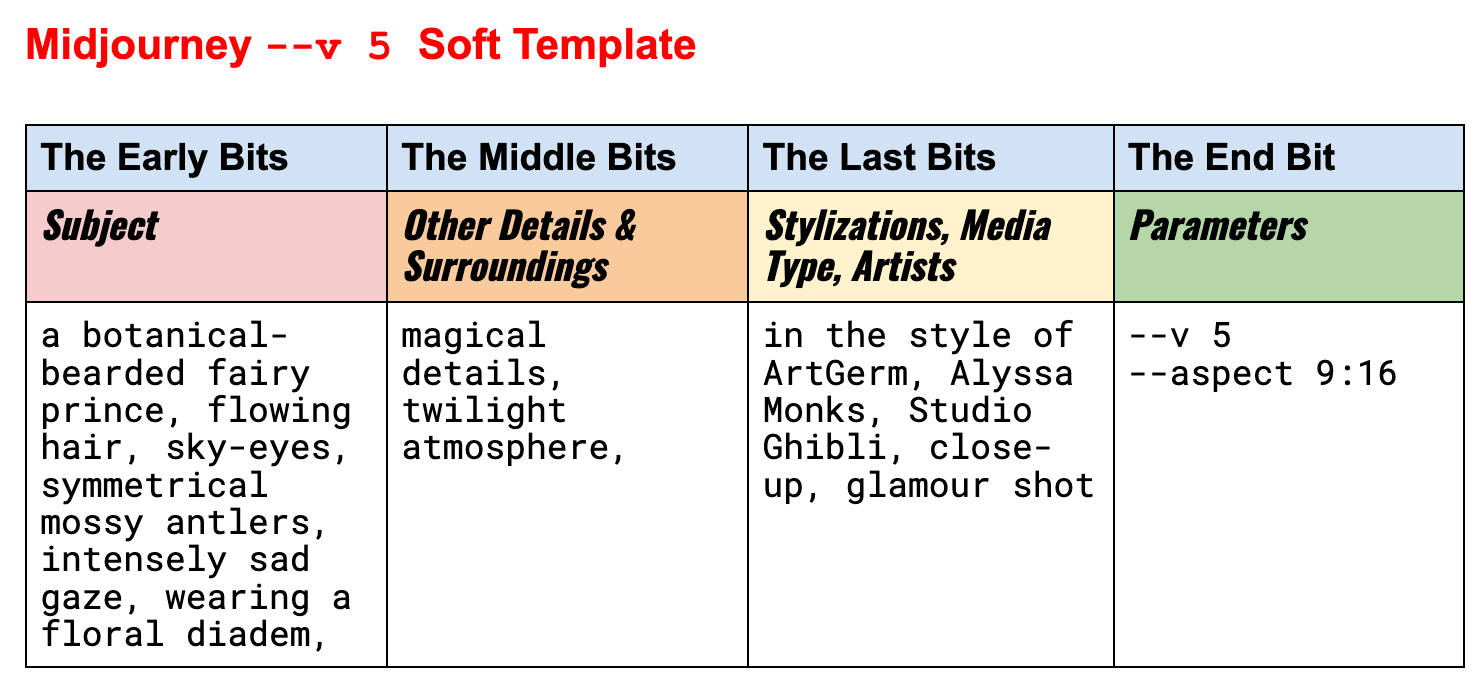
Before summarizing, I would like to introduce Midjourney's official framework:

The official template is very simple, divided into four parts:
- Main body
- Details & Background
- Style, Medium, Artist
- Parameters
My Summary:
Actually, if you follow the official template, you can already surpass 90% of beginners.
However, based on my experiments, I refined their template with the following adjustments:
- I put the type at the beginning because prompt order affects weight (see details in my translation of Midjourney's official FAQ).
- The official Middle Bits and Last Bits are written quite broadly, so I split them up to make it easier for everyone to remember.
I summarized this framework in a table that you can selectively use according to different scenes.
Type For example, watercolor paintings, illustrations, and so on. Main body Please describe the main subject in the picture with as much detail as possible. If the details are not described clearly, Midjourney will randomly draw it for you. The main subjects are generally divided into two categories
- Who: For characters, please describe their gender, appearance, expression, demeanor, clothing and so on.
- What: For objects or things in the picture, please describe what they are and their material type/color.Environment The main components of the environment are as follows:
Background: This is generally divided into two categories:
Solid color: mainly based on color, or gradient
Scenery: such as indoor background, street scene background, etc.
Lighting: Where does the light come from and what type of light is it?
Weather: If it's an outdoor scene, you can add it appropriately to make your photos more natural.
It's also best to describe a background that matches the subject well.
Otherwise, it will look strange. If you don't need a particularly special background, I suggest leaving this section blank and letting AI generate one for you. It usually won't be too bad.Compose Once the subject and environment are confirmed, it's time to think about how to compose the shot. For example:
Where should the focus of the lens be?
What is the orientation of the subject?
What is the proportion between the subject and background in the frame?Shooting medium Here are a few key points:
Camera model
Film
Lens
Camera settings (such as exposure, aperture, etc.)Style Can be remembered with 4W:
When: What era's style?
Who: Whose style do you want? (Person or organization)
What: What type of art style? Or the style of an art movement?
Where: Which country's style?Parameter These photo-like parameter settings, such as:
clarity
aspect ratio
For more information, please refer to the relevant introduction of parameters.
How to memorize?
This template may look long, but it's actually very similar to taking photos (just with optimized weighting of the steps). Think about your entire process of taking a photo:
- Seeing a certain object/person (subject) that looks beautiful in a certain environment (setting)
- Taking out your phone (medium), opening the camera, using the viewfinder on your phone to compose the shot (composition), and pressing the shutter button
- Finally editing it with some post-processing techniques (style & parameters).